Written by Daniel Rutschmann.
Contents
This article is shows you how to install and set up Code::Blocks and GCC on Windows. Do not follow this article if you are on Linux or Mac.
Install GCC (a C++ compiler)
On Windows
Install mingw-w64. Run the Windows installer (https://sourceforge.net/projects/mingw-w64/files/ — “MinGW-W64 Online Installer”).
On a 64 bit Windows, use the following settings:

Settings for 64 bit Windows
If you have a 32 bit Windows, select i686 as architecture.
On Ubuntu
Make sure that you have GCC installed, preferably a version . To see which version you have installed, simply run gcc --version from the terminal.
Install Code::Blocks
On Windows
Download and run the installer from Sourceforge. You don’t need to change any of the installation options, the default ones are fine. Select “Yes” to run Code::Blocks now.
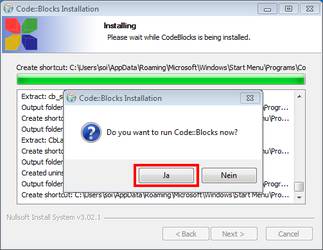
Run Code::Blocks now
When you run Code::Blocks for the first time, it asks you which compiler it should use. Just hit ‘OK’, we will configure the compiler manually.
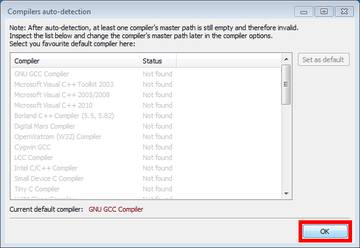
Compilers auto-detection
Select ‘No’ when asked whether you want to change the file extension policy.
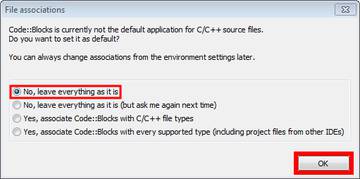
File associations
Next we will set up the compiler settings. Click on Settings>Compiler.
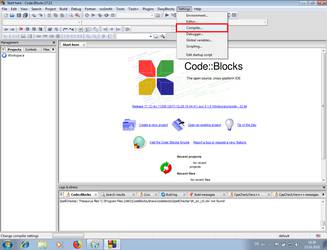
Compiler options menu
Select Cygwin GCC. (Yes, we are not using Cygwin, but the minGW64 compiler executable names match those from Cygwin.).
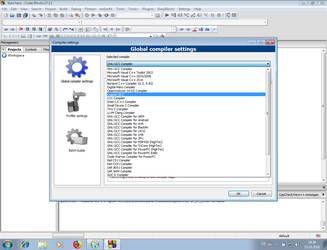
Select Cygwin GCC
First of, click on ‘Set as default’.
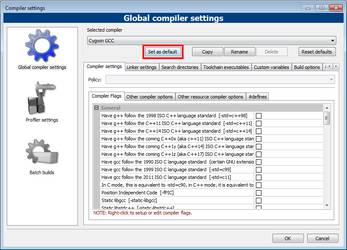
Set as default
Next, on the ‘Toolchain executables’ tab, set the installation directory to the place you installed minGW. (On Ubuntu, the path should be /usr/.)
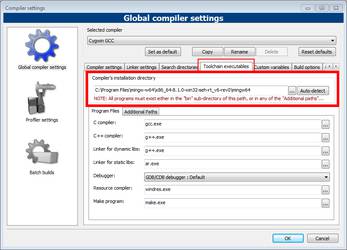
Toolchain location
Next, we will configure the compiler flags. Go to the ‘Compiler settings’ tab, select the ‘Other compiler options’ tab and paste the following flags
-std=c++17-Wall-Wextra-DLOCAL_RUN-D_GLIBCXX_DEBUG-Wno-sign-compare
Now hit ‘OK’. If the compiler asks you about enabling compiler flags, click ‘Yes’.
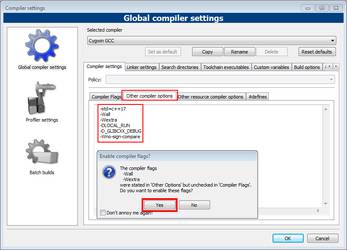
Enable compiler flags
You’ll get an environment error in the bottom right, talking about ‘GNU GCC’, but you can safely ignore it, as we set the compiler to ‘Cygwin GCC’.
On Ubuntu
Try running sudo apt-get install codeblocks. On some versions of Ubuntu, this installs an ancient version of Code::Blocks. (Version 13.12) If that is the case, try the following commands instead to get version 16.
sudo add-apt-repository ppa:damien-moore/codeblocks-stablesudo apt-get updatesudo apt-get install codeblocks
Next, follow the instructions for Windows, but use ‘GNU GCC’ instead of ‘Cygwin GCC’.
Set up GDB
Click on ‘Settings>Debugger…’.
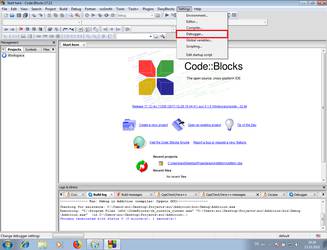
Debugger settings
Click on ‘Default’ and set the ‘Executable path’ to the gdb.exe in the folder you installed minGW. In my case, this is C:\Program Files\mingw-w64\x86_64-8.1.0-win32-seh-rt_v6-rev0\mingw64\bin\gdb.exe. (On Ubuntu, this would be /usr/bin/gdb.)
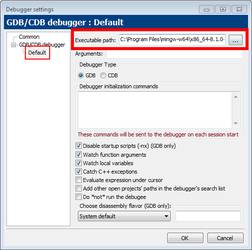
Configure debugger path
Then click ‘OK’.
Configure the default view
You can clean up quite some space on your screen by removing some of the toolbars. Click on ‘View>Toolbars’ and uncheck the following
- Browse tracker
- Code completion
- DoxyBlocks
- FortranProject
- IncrementalSearch
- NassiShneidermanPlugin
- Threadsearch
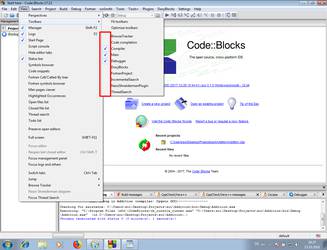
Toolbars removed
Install the SOI project template
On Windows
Download and unzip the SOI project template from here. (If you’re on Ubuntu, instead use the version here.) Open your Code::Blocks installation directory (In my case C:\Program Files (x86)\CodeBlocks) and navigate to share\CodeBlocks\templates\wizard. In there, you should find a bunch of folders (‘arduino’, ‘arm’, ‘avr’, …).
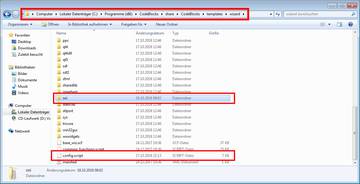
Copy files from zip to wizard
Copy the ‘soi’ folder from the zip file into the wizard folder. (The resulting folder path should look something like C:\Program Files (x86)\CodeBlocks\share\CodeBlocks\templates\wizard\soi.) We now also need to register the template.
- Copy config.script from the wizard folder to your desktop.
- Edit config.script on your desktop: Open the file in your favorite text editor. Below function RegisterWizards(), there should be a bunch of lines with calls to RegisterWizard(...). Before all those lines, add a new line with
RegisterWizard(wizProject, _T("soi"), _T("A SOI task"), _T("Console"));
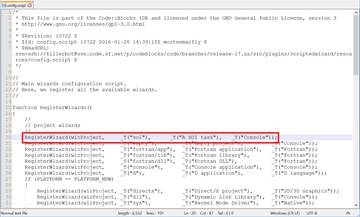
config.script with newly added line
- Copy config.script from your desktop back to the wizard folder, overwriting the existing file. If you’re asked about admin rights, agree to continue.
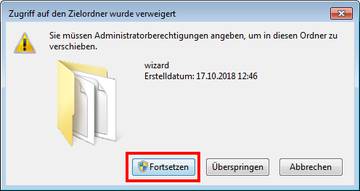
Allow admin rights
At this point, you should reopen Code::Block, so that it registers the project template.
On Ubuntu
The path to the wizzard folder should be /usr/share/codeblocks/templates/wizard/. On order for you to be able to edit the files there, you’ll need to run file manager with sudo. (sudo nautilus from the terminal.) Other than that, you can follow the instructions for Windows.
Creating a project
To create a project, click on ‘File>New>Project…’.
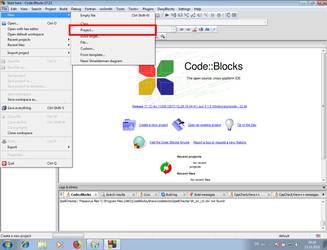
Creating a new project
Select ‘A SOI task’ and hit ‘Go’.
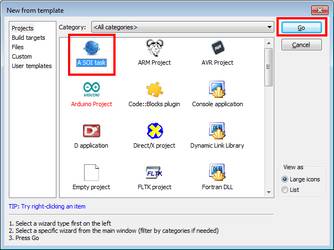
Console application
On the next page, name the project and select a folder to create it in. You probably want to create an empty folder to place all SOI-projects in.
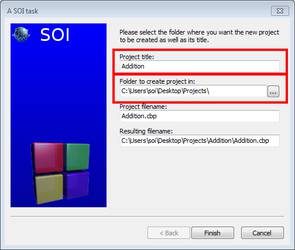
Project name and location
Hit ‘Finish’. A security warning will pop up about Operation: RENAMEFILE. Select Mark this script as TRUSTED permanently. (You can have a look at the script at C:\Program Files (x86)\CodeBlocks\share\CodeBlocks\templates\wizard\soi\wizard.script and check that it is safe to run.)
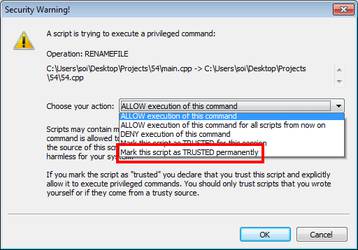
Mark script as trusted
To open the cpp file, uncollapse the Sources folder and double click on <projectname>.cpp. The project also contains two sample inputs, you can find them in the Others folder. You can ignore the Headers folder.
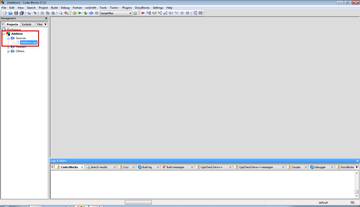
Double click on <projectname>.cpp
Building and Running
First, make sure that the project you want to build is selected on the left. To select a project, simply double click on its name. (“Addition” in this case.)
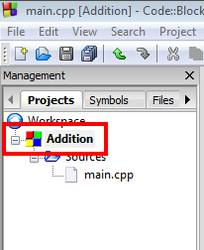
Select project
- To build, click on the yellow gear. (Hotkey: Ctrl-F9).
- To run, click on the green arrow. (Hotkey: Ctrl-F10)
- To both build and run, click on the yellow gear with the green arrow. (Hotkey: F9)

Build and/or run
In projects created with the SOI template, there are two different targets you can use
- Console: Read from console input.
- Samplefiles: Read from sample01.in, sample02.in, sample03.in, … (located in the project folder.)

Select target
If the compilation fails, you can see the error messages at the bottom. Double clicking on one of them then shows you the line where the error occurred.
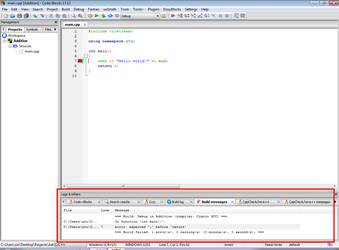
Build and/or run
Debugging
Before running with GDB, click to the left of the first line of your main function. This creates breakpoint and a red dot will appear.
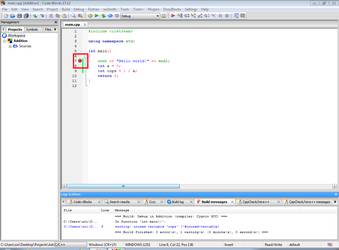
Set breakpoint at start of main
Next, click on the red arrow to run with GDB. (Hotkey: F8) The program then starts and breaks at the breakpoint.
At this point, we can set up the GDB perspective. Click on the icon with the bug and select ‘Watches” and ‘Call stack’.
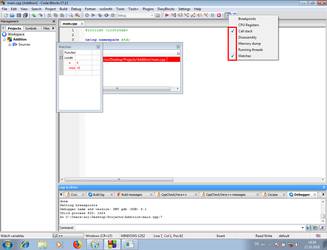
Select ‘Call stack’ and ‘Watches’
You can the move the two windows to a more convenient place, such as the left hand side.
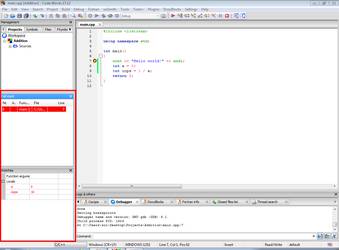
Move windows to the left
If you ever get asked to save the perspective, click “Yes”.

Save perspective
Now we’re ready to debug. You can use the icons on the debugger toolbar for various thing.
- Continue until we hit a breakpoint, a crash, or the program finishes. (Hotkey: F8)
- Execute the current line. (Hotkey: F7)
- Execute a single step. (Hotkey: Shift-F7)
- Continue until we return from the current function. (Hotkey: Ctrl-F7)
- Terminate the program and stop debugging. (Hotkey: Shift-F8)
At any point, we can see the current variables and the function on the stack on the left hand side.
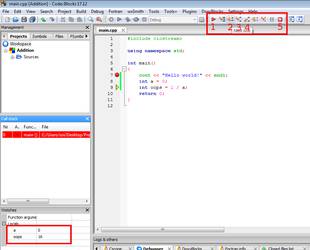
Debugger perspective
If we run into a crash, an info message will pop up describing the crash. (In the screenshot, it is a division by zero.)
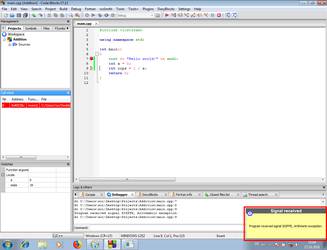
Crash message